Outdoor Bench
Building an Outdoor Bench using Old Fence Boards
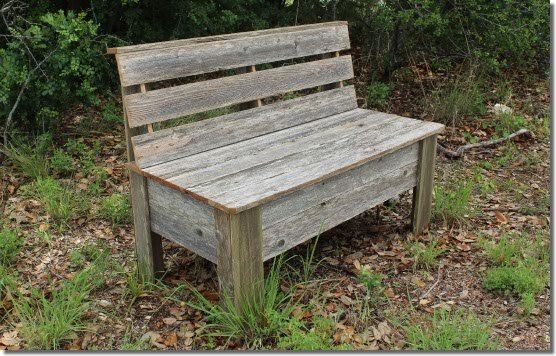
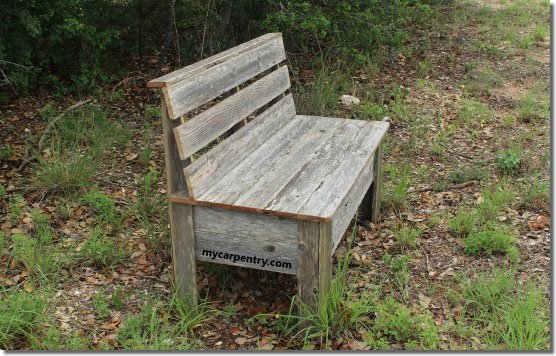
I built this outdoor bench project using old cedar fence boards that would have likely ended up in a landfill. I built this bench exclusively from weathered 1x4 western red cedar, but you can also use new wood to make your outdoor bench.
Rustic Bench Plans
| Description | Size | Quantity |
| Base (front and back) | 1x4x39 | 4 |
| Base (sides) | 1x4x18* | 4 |
| Base blocking | 1x4x7.5 | 6 |
| Base (seat joists) | 1x4x16.5* | 2 |
| Legs (front) | 1x4x16.5 | 2 |
| Legs (back) | 1x4x30 | 3 |
| Leg side supports | 1x2.5x16.5 | 4 |
| Seat | 1x4x42 | 5 |
| Back | 1x4x42 | 3 |
| Seat back pitch boards | See diagrams | 3 |
| Seat back (top) | 1x3x42 | 1 |
*To provide about 1-1/2" of overhang on the front of the bench, I cut the base 18" because the seat boards were slightly under 4" wide. I did not want to rip the seat boards to provide the 1-1/2" overhang.
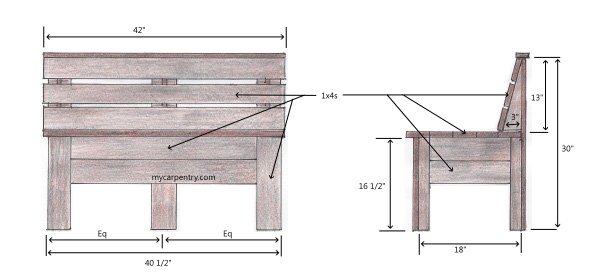
Outdoor Bench - Elevations
Building the Outdoor Bench
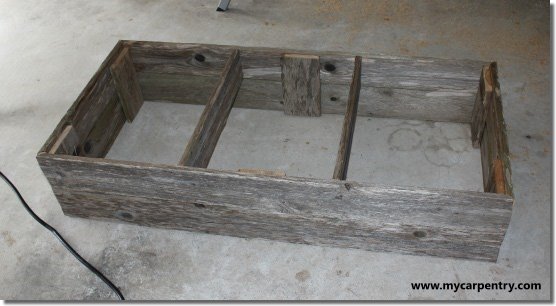
Assemble the four parts of the upper and lower base sections. Place one section on top of the other and secure them together using the six base blocking pieces placed on the inside front, back, and corners of the two sections (see diagram below). Add the seat joists with even spaces between them on each side.
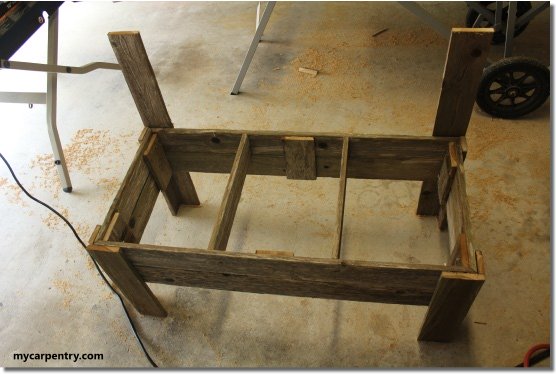
Attach the side leg supports (4) flush to the top of the bench base and flush to the front and back of both sides of the bench.
Attach the front legs (2) flush to the top of the bench base and flush to the outside edge of the side leg supports.
Attach the two outer back legs flush to the bottom and outside of the back leg supports.
Add the seat boards starting from the back of the bench and working towards the front. Center each board so that they overhang the same on each side.
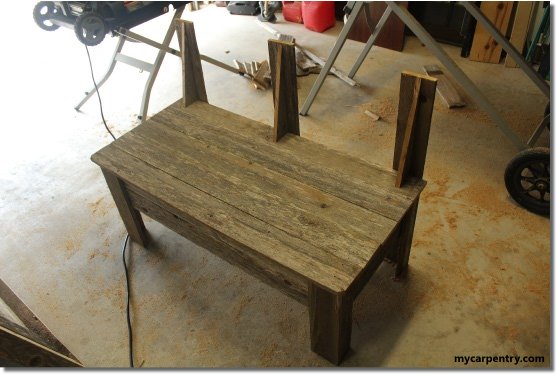
Add another back leg centered between the two outside back legs. Add the tapered back pitch boards as shown in the picture below.
Add the bottom backrest board, holding it tight to the top of the seat. Add the upper backrest board flush with the top of the three back legs. Add the center backrest board centered between the top and bottom backrest boards.
Finally, add the 3-inch wide top backrest board and nail it to the upper backrest board and the top of the back legs. Ensure it is flush on the front, as shown in the picture below.
If you have any questions about these outdoor bench plans, please don't hesitate to contact us.
Outdoor Benches - Check out more wooden bench plans on mycarpentry.com.
Outdoor Furniture Plans - See more birdhouse plans on mycarpentry.com.
Woodworking Projects - See more woodworking projects on mycarpentry.com.
DIY Projects - Check out the DIY projects on mycarpentry.com.
What next?
Leave outdoor bench plans and visit our home page.


