Homemade Bird Feeder
Simple Bird Feeder Plans
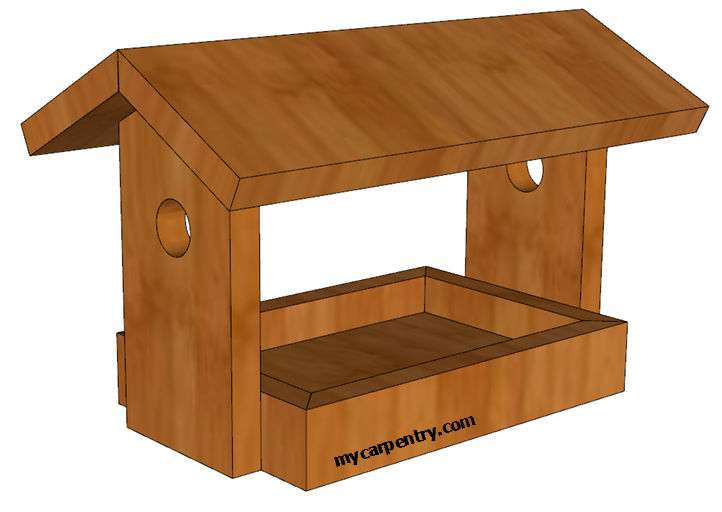
Homemade Bird Feeder - these simple free bird feeder plans make building a bird feeder easy. I made this wooden bird feeder exclusively from old fence boards, so the only cost was a few nails and screws and a 2-foot length of 3/32" diameter Galvanized Wire Rope.
Using old fence boards and other scrap materials for projects like this helps keep the landfills free of craft supplies.
I used a table saw to rip the width of the base parts and a miter saw to cut the pieces to length, but you can use a circular saw, or even a hand saw, to do both if you don't have access to the other tools.
Here's the material list:
| Part Name | Size | Quantity |
| Base | 5-1/2 x 8-1/2 x 3/4 | 1 |
| Base Frame (sides) | 1-3/4 x 10 x 3/4 (See Note) | 2 |
| Base Frame (ends) | 1-3/4 x 7 x 3/4 (See Note) | 2 |
| Uprights | 8 x 4 x 3/4 | 2 |
| Ridge | 1-1/2 x 10 x 3/4 (See Note | 2 |
| Main Roof | 4-1/2 x 14 x 3/4 | 2 |
| Galvanized Finish Nails | 8d | Small Box |
| Coated Deck Screws | 1-5/8" | Small Box |
| Galvanized Wire Rope | 3/32" Diameter | 24" (+/-) |
| Ferrule & Stop Set | 3/32" | 1 Set |
Homemade Bird Feeder
Note: The outside dimensions of the base frame determine the base's size plus the framing material's actual width. These plans assume that all materials are 3/4" thick. I recommend cutting each piece of the bird feeder as needed, not all in advance.
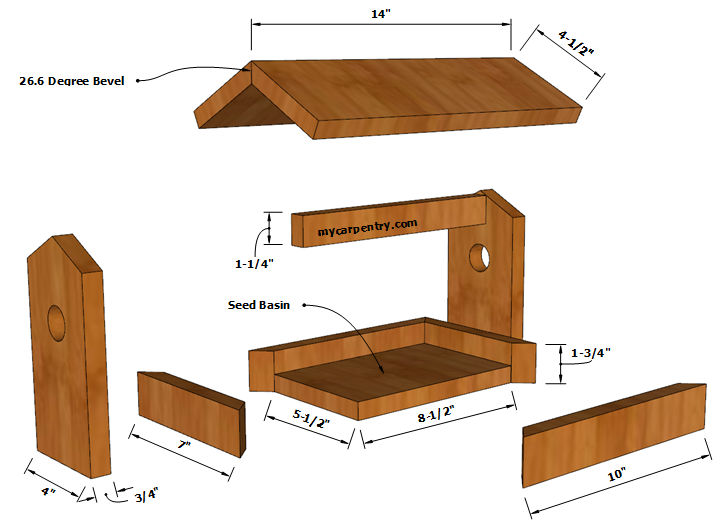
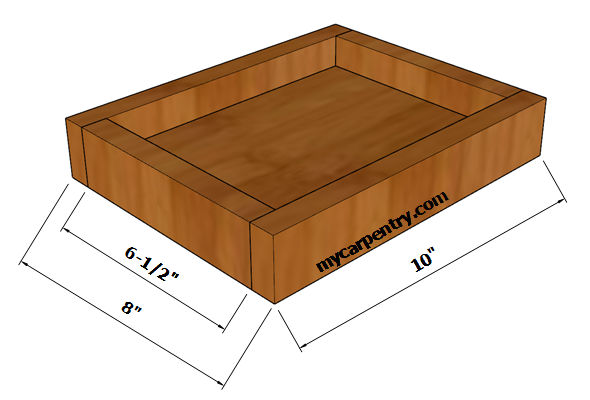
First, cut the base to the size indicated. If you plan to miter your joints, as shown in the diagram above, cut the pieces measured from the short points of the 45-degree angles and attach them to the base using galvanized finish nails. You can optionally butt-joint the pieces, as shown below.
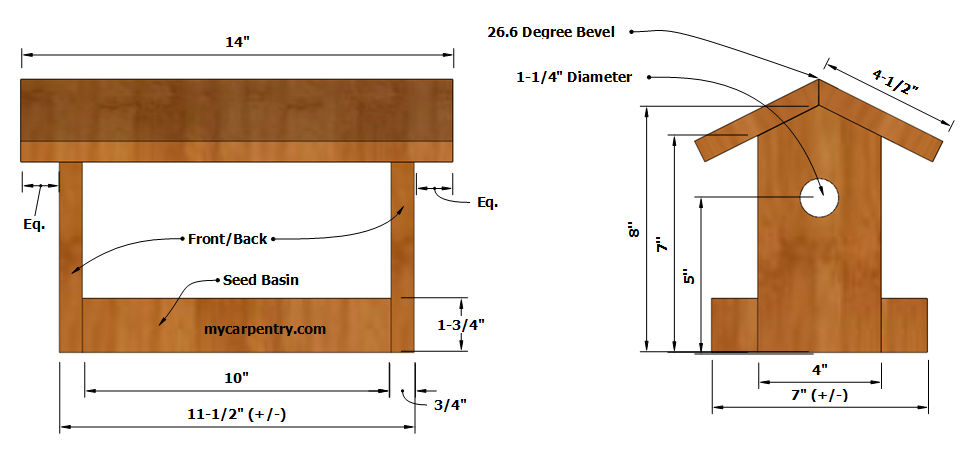
Cut the two 8-inch long uprights from a 4-inch wide 1x4 fence board. Measure from the bottom of each side 7 inches and make a mark. Find the center of the 1x4 (should be two inches from each side) and make a mark at the top. Draw a line that connects the top center mark with the 7" mark on each side of the upright; these lines make the roof slope. Cut off the two corners.
From the center of the 1x4, measure up 6 inches from the bottom of the board and make a mark in the center. This mark is the center of the 1-1/4" to 1-1/2" entrance hole. Drill the hole with a paddle bit or hole saw bit. Use the first upright as a template for laying out the remaining upright.
Attach the two uprights to each end of the framed base using a combination of wood glue and 1-5/8" screws.
For the size of the Ridge piece, measure the finished length of the framed base. Once cut, attach it to the uprights as shown in the drawings, using glue and galvanized finish nails.
Cut the two main roof sections to the dimensions indicated, beveling one long edge of each piece **26.6 degrees.
** I used the Roof Pitch Calculator to determine the pitch and angle of the roof based on a 1-inch rise and a 2-inch run. Wow! The roof pitch calculator even works on small projects!
Cut the remaining pieces of the bird feeder and assemble them as shown in the drawings using galvanized finish nails or screws.
To hang the bird feeder:
- Drill two 1/8" holes through the center of the roof between two roof supports.
- Cut a piece of wound cable about two feet long and thread each end into the roof holes.
- Crimp two aluminum stops on each end on the underside of the roof and pull up the slack on top of the roof.
Birdhouse Plans - Check out more birdhouse plans on mycarpentry.com.
Woodworking Projects - See more woodworking projects on mycarpentry.com.
DIY Projects - Check out the DIY projects on mycarpentry.com.
What next?
Leave homemade bird feeder and visit the mycapentry.com home page.


