Owl House Plans
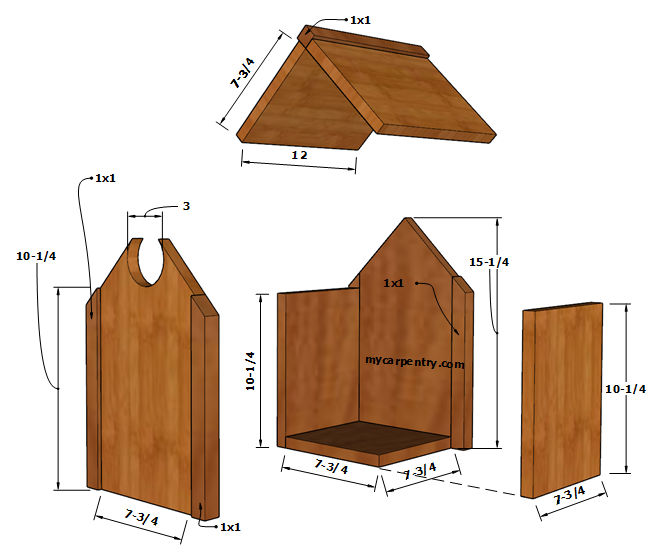
These owl house plans work best for a Screech Owl or a Boreal Owl. These two owl species require an owl house with an 8" x 8" floor (roughly), an inside height of 12-15 inches, and an entrance hole 3 inches in diameter.
|
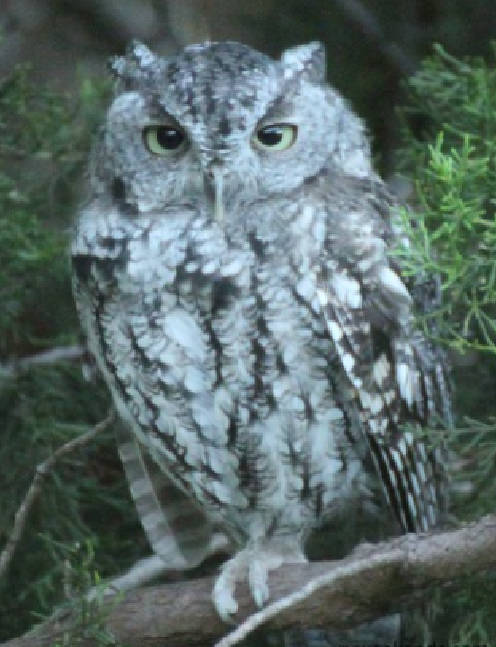
One fine day, while mowing my yard near a cluster of juniper trees, I was startled by this Screech Owl sitting in the tree not three feet from my face. The owl was not disturbed. He remained in the same tree for almost a week before moving on. The owl's visit gave me the idea to create these owl house plans. |
|
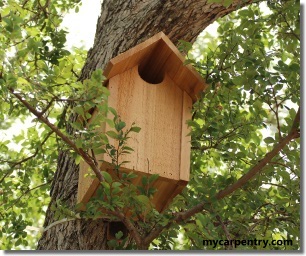
The owl house attached to the tree (below) is the finished product. I attached it to the tree by bolting a piece of 1x3 to the back of the house. I cut the 1x3 so it extends about 3 inches past the top and bottom of the owl house. I used heavy-duty wire ties to affix the house to the tree.
Owl House Plans - Construction
Please read the complete instructions before you begin building this owl house. You may choose to use different for your owl house plans.
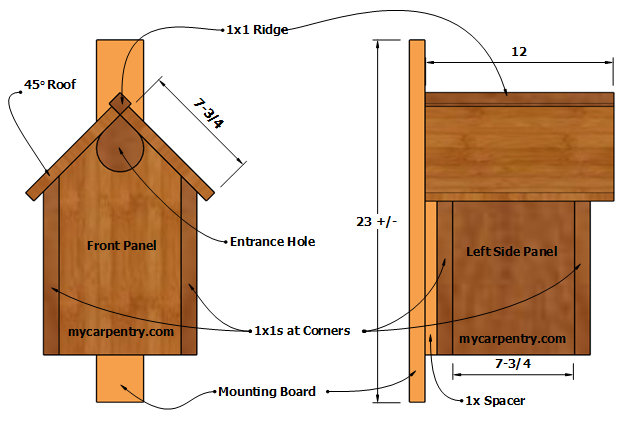
A single 1" x 8" plank that is 8 feet long is all you need for the bottom, front, back, sides, and roof. A typical rough-cut cedar 1x8 measures approximately 3/4 x 7 3/4 (depending on the mill). I added some custom 1x1 trim on the corners of the house to make the inside dimensions a little bigger and to add some style to the owl house. Here is the complete material list:
| Material | Size | Quantity |
| Western Red Cedar | 1" x 8" x 8' | 1 |
| Western Red Cedar | 2" x 2" x 6' | 1 |
| Western Red Cedar (for mounting) | 1" x 3" x 26" | 1 |
| 16 Gauge Galvanized Finish Nails | 2" | 50 (approx.) |
| Galvanized Wood Screws | 1 1/2" | 10 (approx.) |
| Carriage Bolts and Washers | 5/16 x 3" | 2 |
From the 8' cedar plank, cut the bottom, sides, ends, and top pieces to the lengths indicated in the diagrams on this page. Rip the 2x2 to make 1" square stock (6' long) using a table saw.
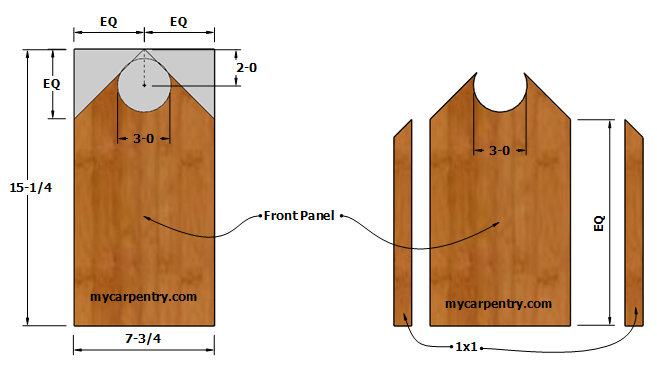
To cut the roof angle:
- Measure to the center from one of the end pieces and make a mark on the top.
- From that mark, take a square and mark a 45-degree angle on both edges of the board (see below).
- Cut the roof angle on the front panel, then use it as a template to lay out the back panel.
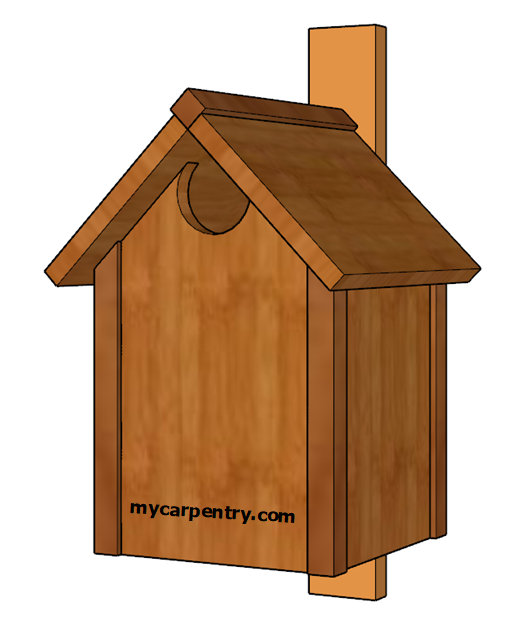
Cut the four corner pieces from the custom 1x1 so that, when nailed to the front and back pieces, they are flush on the bottom (90 degrees) and top (45 degrees). Attach the four corners to the front and back pieces. See the diagrams above and below.
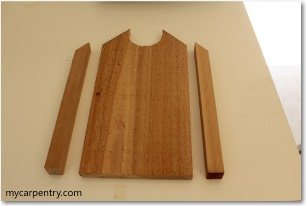
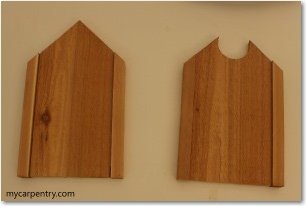
The entrance hole is 3" in diameter. You can use any method you want to draw the circle. I found a can in my garage that had a 3" base and positioned it up at the top of the front panel and drew a circle around it with a carpenter's pencil. If you have a 3" hole saw, you can use it to cut the hole. If you don't, you can use a jig or coping saw.
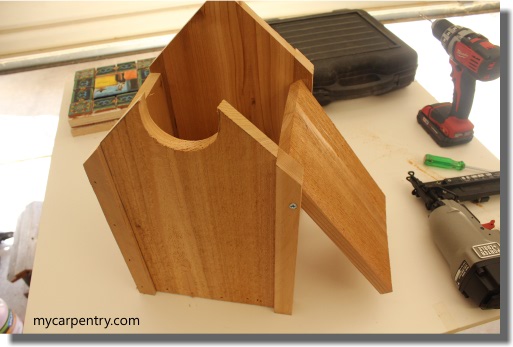
Attach the front and back pieces to the bottom piece and one of the side pieces using the 2" nails. Attach the remaining side using the 1 1/2" wood screws, one on each side about an inch from the top. The screws will serve as a hinge so that you can clean the nest box from time to time. (see below)
Use another screw to secure the bottom of the side (hatch) to the bottom piece (not shown). Pre-drill the hole for the screw to prevent splitting the wood.
Attach the roof pieces as shown in the diagrams below. Note the wooden spacer for the 1" x 3" mounting board - its thickness matches the overhang on the back side of the roof.
When you attach the mounting board, the spacer keeps the owl house level. Use 4 of the 1 1/2 screws and the two carriage bolts to attach the mounting board to the back of the owl house.
The mounting board shown in these owl house plans is optional. There are many other ways to mount this owl house. If you have ideas for mounting options, please share them with us.
Visit eBird to learn more about birds and discover the world of birding.
What next?
Leave Owl House Plans and visit our home page.


